I love maxi skirts, especially in the summer. They’re flattering, comfortable and most importantly, easy to make!
Last year I lengthened the Miette skirt pattern by Tilly and the Buttons to make this maxi.
I’ve heard that people have had problems making this maxi pattern though. The main sticking points seem to have been fabric choice and drafting the new maxi pattern. I hope this tutorial clarifies the process and helps you make a problem-free maxi Miette skirt. This is a fun skirt to wear and it’s also fun to make!
Please note: You can maxify the Miette skirt by lengthening the pattern at the lengthen line on the pattern but I’m showing you how to lengthen it at the hem. This method results in a more flared hem.
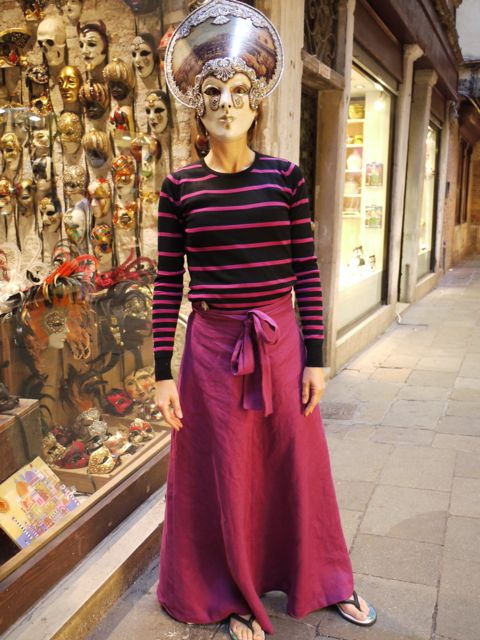
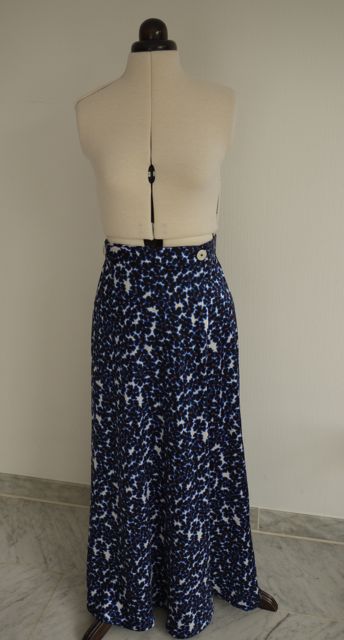
This is my 2014 version. I added buttons to the waistband instead of the tie.

-
What You’ll Need to Make Your Maxi Miette
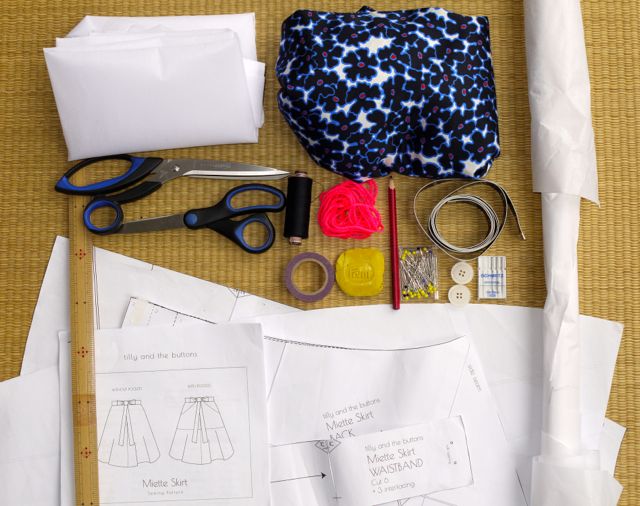
- Miette skirt pattern by Tilly and the Buttons (www.tillyandthebuttons.com)
- Appoximately 2.5 to 3 metres of fabric, depending on your fabric width and pattern size. I needed just over two metres of 140cm wide fabric for my skirt in size 3. I suggest you make your pattern first and then guess-timate how much fabric you’ll need.
- Sewing thread to match your fabric
- An appropriately-sized sewing machine needle for your fabric – I used a new 60 needle for my fine silk mix fabric.
- Piece of string/wool/shoe lace or similar
- Pencil
- Pattern paper – I used plain white wrapping paper that is slightly transparent.
- Tape measure
- Ruler
- Pins
- Fabric scissors
- Paper scissors
- 2 Buttons or snap fasteners
- Interfacing (for the waistband pieces)
-
Fabric Suggestions
Light weight woven fabrics with drape such as shirt-weight cottons and linen, silk and silk mixes, viscose, etc would work best for the maxi skirt.
These fabrics will give you a fluid and gently flared silhouette compared with the original midi Miette which in heavier fabrics such as denim, has a more pronounced ‘A’ line shape.
For my first maxi Miette I used a lightweight linen and for my second, a cotton/silk mix shirt-weight fabric.
-
Finding Your Maxi Miette Skirt Length
Using your tape measure, measure the length from the narrowest part of your middle, this is your natural waist, or wherever you’d like your waistband to sit, to the length you’d like your finished skirt to be.
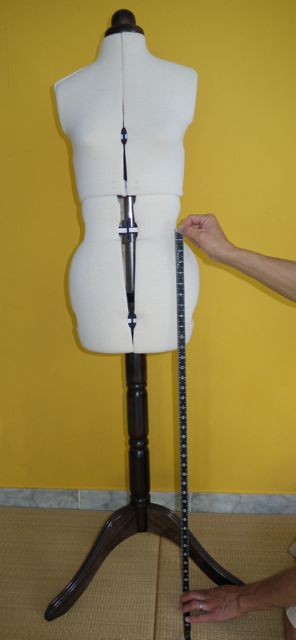
I’m 162cm tall and for me this measurement is 98cm. My original Miette skirt pattern pieces are 60.5cm long along the side seams – including seam allowances, 57.5cm without seam allowances. The waistband is 7cm wide and has finished width of 4cm.
Therefore 57.5cm length of front and back skirt pieces + 4cm wide waistband = 61.5cm total skirt finished length of the side seams of the original Miette skirt pattern in size 3.
I want my maxi to be 98cm long (excluding seam allowances) so 98 – 61.5cm = 36.5cm. 36.5cm is how much I’m going to extend my front and back skirt pattern pieces by.
-
Drafting the Maxi Skirt Pattern
First you’ll need the Miette skirt pattern printed out, taped together and the front, back and waistband pattern pieces cut out in your size. Seam allowances are already included.
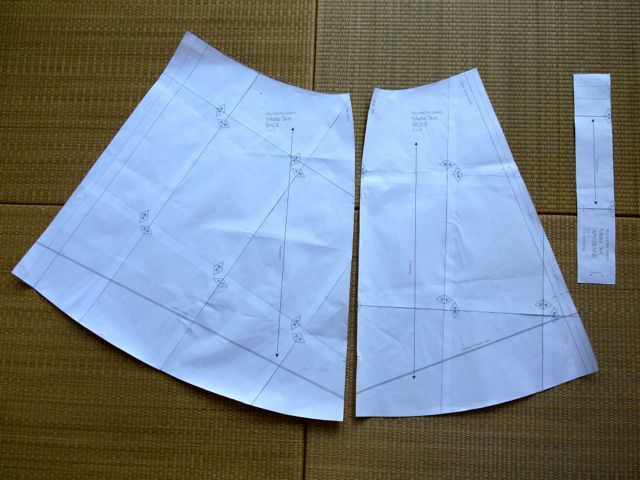
Next using easily removable adhesive tape such as masking tape, tape the front and back skirt pattern pieces (keeping the centre lines of the pattern pieces vertical) to your pattern paper preferably on a large flat surface – I used the floor!
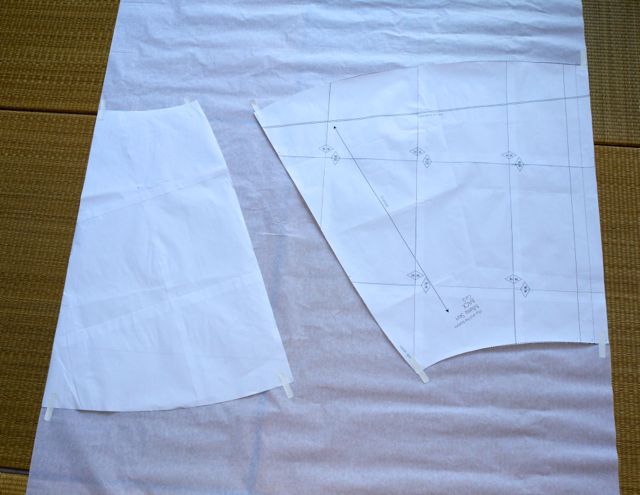
Trace around the front and back skirt pattern pieces.
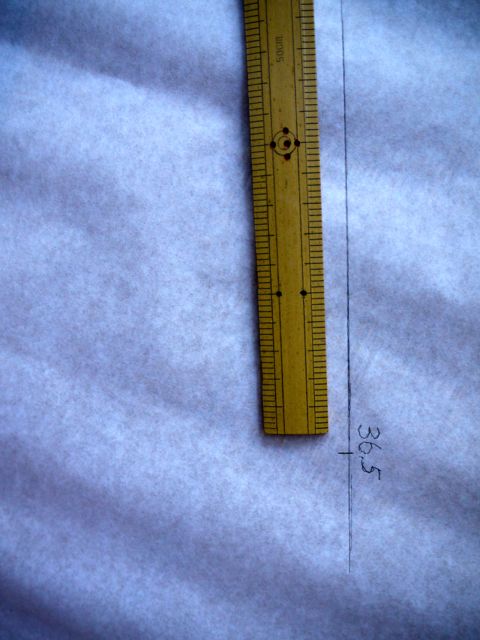
Then measure down from the skirt hemline and mark your desired maxi skirt length onto your pattern paper on both sides of the front and back skirt pattern pieces. I extended mine by 36.5cm from the original skirt pattern length – see the ‘Finding your maxi Miette skirt length’ formula to find out what this is for you.
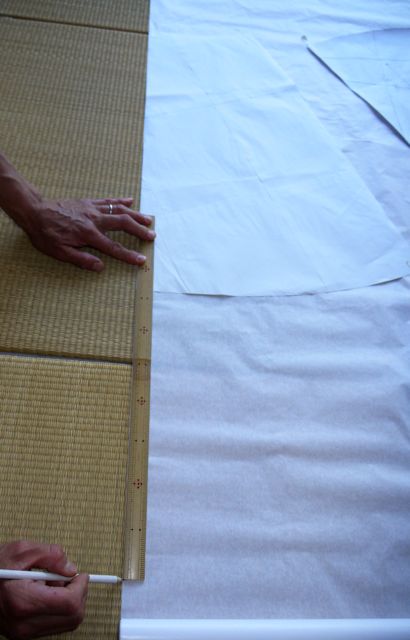
Do this for both sides of the front and back pieces, following the angles of the pattern pieces.
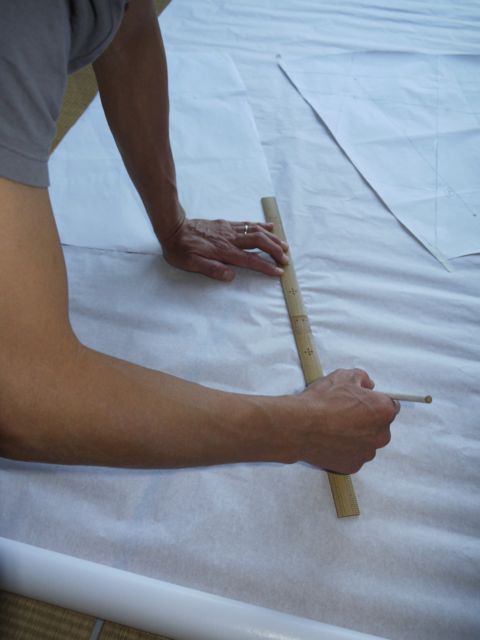
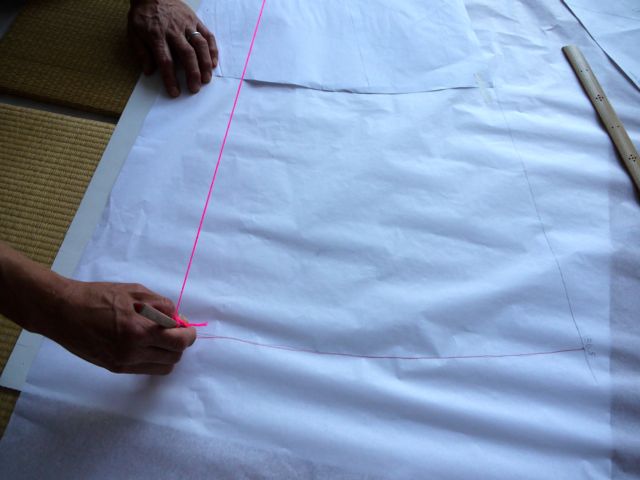
I’m extending my front and back pattern pieces at the hemline by 36.5cm.
Next use a willing helper/weight/chair leg, etc to secure one end of yarn at the top of your pattern paper and tie a pencil to the other end. Then pull the yarn and carefully swing between your two markings and connect the two points with your pencil and mark on your new maxi hemline.
I recommend using a yarn with some elasticity to it to compensate for the side seam and centre seam slight length differential. The more ‘give’ your yarn has, the easier it’ll be to create a nicely curved hem.
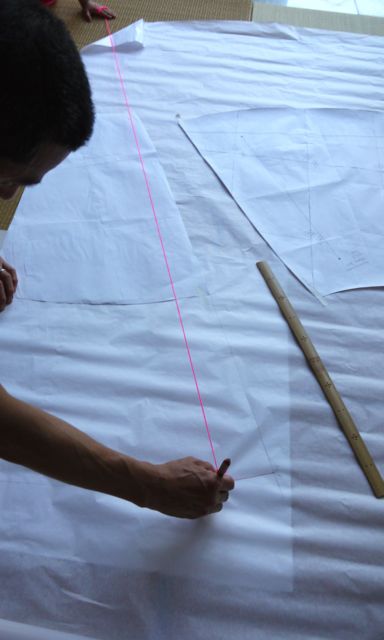
This’ll produce a curved hemline similar to the shape of the original Miette hemline.
Repeat this process for both front and back skirt pattern pieces.
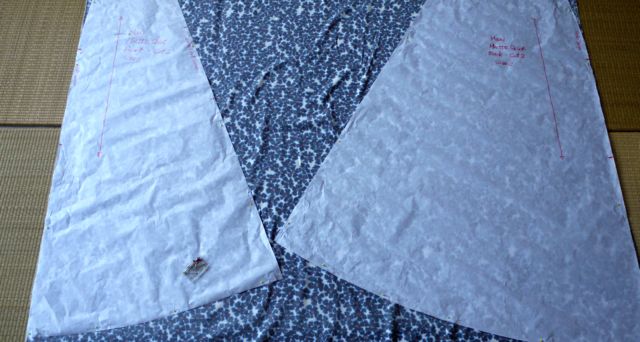
Now transfer the pattern construction marks – notches, grainlines, etc onto the new pattern pieces and label the front and back pieces, by laying your new pattern over the old and tracing.
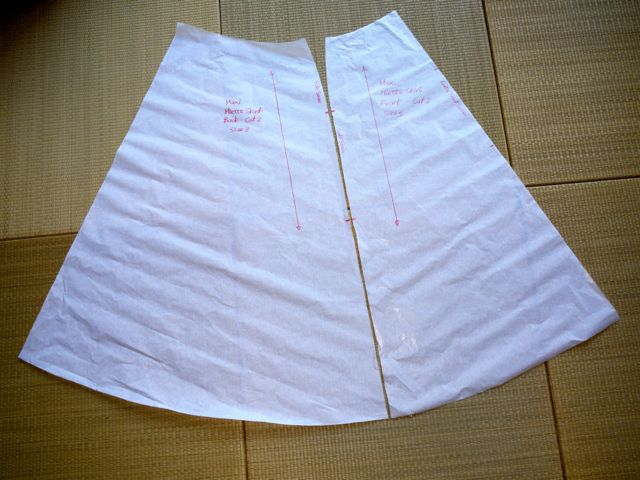
After you’ve cut out your new pattern pieces, lay them out and match up the side seams for the front and back pattern pieces and check they’re the same length. If the side seams match up then you should have no problems sewing up your new maxi skirt!
Don’t be alarmed when you notice that the centre seams are about one centimetre shorter than the side seams on the front and back pattern pieces – this is the original Miette design!
-
Pattern Layout on Fabric
Now we’re ready to lay our pattern pieces on the fabric ready to cut out.
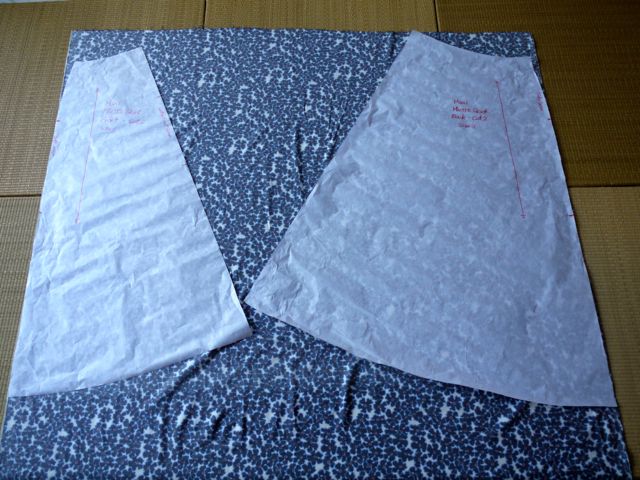
My fabric was 140cm wide and I cut my fabric out using the entire width of the fabric rather than on the fold.
-
Line Up Grainlines
Line up the grain line of the pattern pieces with the selvage edges of the fabric.
-
Fabrics With Directional Designs or Nap
If your fabric has a directional design on it, make sure you place your pattern pieces the right way up on the fabric so that your fabric design is going in the right direction and isn’t going to be upside down when you sew your skirt pieces together.
-
Cut Out 2 Pattern Pieces
Cut the front and back pieces out and then flip the pattern pieces over to the opposite side and cut them out again.
-
Reverse Pattern Pieces, Repeat and Cut 2 More
You should then have two mirror-image front pieces and two mirror-image back pieces.
-
Cut Out Waistband Pieces
Then cut out your waistband pieces and interfacing.
Your skirt pieces should now look like this.
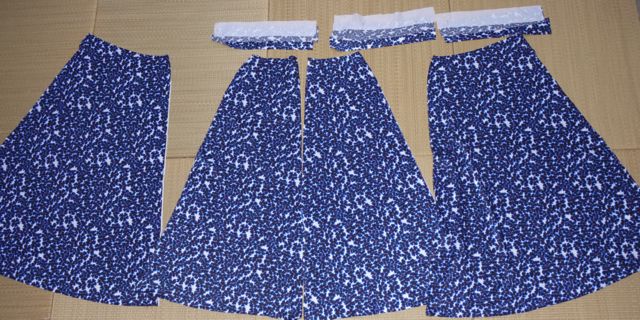
Once you’ve ironed on the interfacing to the waistband pieces, you’re ready to start sewing your skirt – the easiest bit!
-
Sewing Up Your Maxi Skirt
Follow Tilly’s sewing instructions from the Miette pattern.
-
Changes to the Waistband
If you’re omitting the waist tie like I did, trim the waist band to be the same length as the width of the skirt (plus 1.5cm for seam allowance at either end!) – the original waistband pattern pieces are longer than the sides of the skirt slightly. Then sew the ends of the waistband closed on the reverse, trim the seam and turn the waistband end the right way out and continue to sew in the ditch or hand sew your waistband to the inside of your skirt..
-
Hemming
I would recommend using a narrow hem with lightweight fabrics instead of the 2.5cm hem of the original Miette skirt pattern. You could also do a rolled hem or hand sew the hem.
I did a narrow hem of 1.5cm on my 2014 skirt and hand sewed my 2013 hem.
-
Button Closures
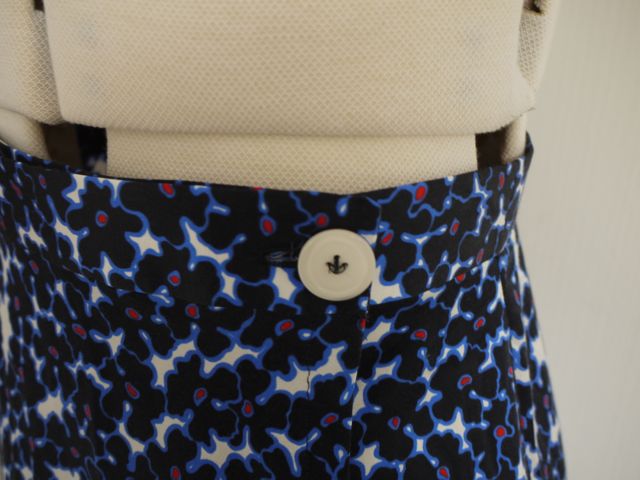
Finally I put two buttonholes and buttons in the waistband on the overlap section of the skirt, (which I wear at the front) to close my skirt. If you’re not comfortable sewing buttonholes, you could hand-sew snap closures on the waistband instead.
Yay, we’re all done!
I wish you luck making your own maxi Miette skirt and please let me know if you have problems or if you find any of this tutorial unclear and I’ll do my best to help you out.
I’d also love to see your skirt so if you make one using this tutorial, let me know in the comments below.
If you enjoyed this tutorial and would like more tips and info, please sign up for the YoSaMi newsletter (it’s free!) – go to the top of the sidebar to sign up!
Happy sewing,
Christine
i wanted to maxify the miette when it first came out and totally forgot!!! yours are beautiful (spooky mask and all 🙂
Thanks Oona! You maxify like no other, I’d love to see your version of this! Sorry for scaring you with the mask. I was in Venice, Italy sampling the carnival masks. This one was handmade and beautifully painted but sadly too expensive for me to buy. I only have this spooky pic to remember it by!
wow that is a lovely version of miette, thank you for sharing…bestest wishes Daisy j x
Thanks Daisy for your lovely comment and for visiting my blog!
Thank you so much for this. I’ve tried lengthening the pattern but has come out completely wrong and this seems so much easier. Now to choose some fabric!!
You’re very welcome! Let me know how you get on.
Thanks for this, it was really helpful. I could have probably worked out extending the seam lines, but using some string to redraw the hem line is a great idea – I would have spent ages doing a bad job, this really saved me time. Remembering to check the length of the side seams also may have saved my bacon! All matching now – just need to actually cut and sew it.
I’m so happy this helped you! Send me a link to your skirt when it’s finished, I’d love to see it.
Thank you for visiting my blog and leaving your lovely comment! I’m not a blog expert but from what I know, your choice of blog platform would depend on what you intend to do with your blog. If you’re using your blog for a business, I’d suggest a paid platform such as wordpress.org. If it’s just for fun, a free one may be good to start with such as wordpress.com. I’ve found both user friendly and easy for the non-techy to get to grips with. I hope that helps and good luck!
Thanks and please visit again soon.